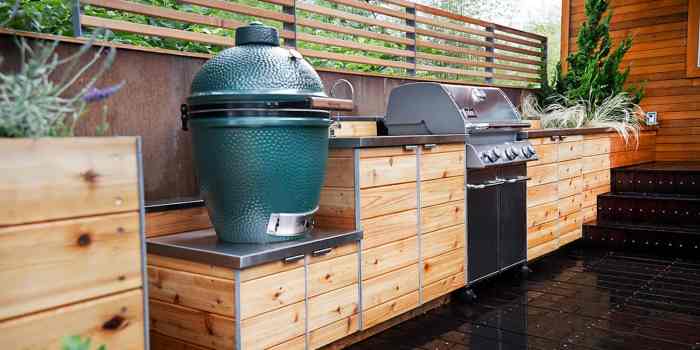
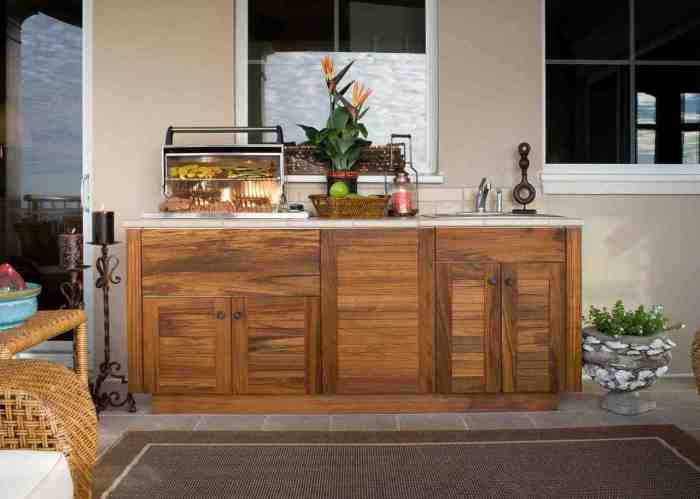
DIY outdoor kitchen cabinets offer a fantastic way to create a personalized and functional outdoor cooking and entertaining area. Building your own cabinets allows you to tailor the design to your specific needs and preferences, maximizing space and functionality while adding a touch of personal style to your outdoor haven.
From planning the layout and selecting the right materials to constructing sturdy frames and adding stylish finishing touches, this guide provides a comprehensive step-by-step approach to building your own outdoor kitchen cabinets. Whether you’re a seasoned DIYer or a beginner, this guide equips you with the knowledge and tools to create a beautiful and functional outdoor kitchen that you’ll enjoy for years to come.
Building the Cabinet Frames

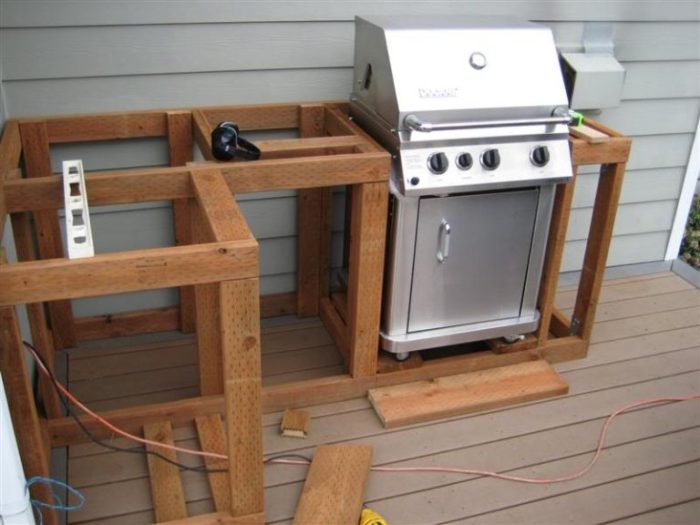
Building sturdy and durable cabinet frames is essential for an outdoor kitchen that can withstand the elements. The frames serve as the foundation for your cabinets, providing support and structure. Choosing the right materials and using proper joinery techniques are crucial for creating frames that are both strong and long-lasting.
Choosing the Right Materials
The choice of materials for your cabinet frames will depend on your budget, desired aesthetic, and the specific conditions your outdoor kitchen will face.
- Pressure-Treated Lumber: This type of lumber is treated with preservatives to resist rot, decay, and insect damage, making it ideal for outdoor use. It’s a cost-effective option and is readily available. However, it may not be the most visually appealing.
- Cedar: Known for its natural resistance to rot and insects, cedar is a durable and attractive wood choice. It’s a bit more expensive than pressure-treated lumber but adds a warm and natural look to your outdoor kitchen.
- Redwood: Similar to cedar, redwood is highly resistant to decay and insects. It has a distinctive reddish-brown color and is known for its durability and weather resistance.
- Tropical Hardwoods: These woods, such as teak and ipe, are extremely durable and weather-resistant. They are also known for their beautiful grain patterns. However, they are the most expensive option and may require special care and maintenance.
Joinery Techniques
Proper joinery techniques are essential for creating strong and stable cabinet frames. Here are some common methods:
- Dado Joints: Dado joints are created by cutting a groove in one piece of wood to receive the edge of another. This creates a strong and secure joint that can withstand a lot of stress.
- Mortise and Tenon Joints: Mortise and tenon joints involve cutting a rectangular hole (mortise) in one piece of wood and a corresponding projection (tenon) on another. This creates a very strong and traditional joint, often used in furniture making.
- Pocket Holes: Pocket holes are created using a special jig that allows you to drill angled holes into the ends of wood pieces. These holes are then used to attach pieces together using screws. Pocket holes are a quick and easy way to join wood, but they are not as strong as traditional joinery techniques.
Assembling the Frames
Once you’ve chosen your materials and joinery techniques, you can start assembling the frames. Here’s a general process:
- Cut the lumber to size: Carefully measure and cut your lumber to the exact dimensions you need for your cabinet frames. Make sure your cuts are precise and clean.
- Create the joints: Using your chosen joinery technique, create the joints that will hold the frame together. If using dado or mortise and tenon joints, use a router or chisel to cut the grooves and projections.
- Assemble the frame: Carefully align the pieces of the frame and use glue and screws or nails to secure the joints. Make sure the frame is square and true before tightening the screws or driving in the nails.
- Reinforce the frame: For added strength and stability, you can reinforce the corners of the frame with corner blocks or braces. These pieces of wood are attached to the inside of the frame to prevent warping or twisting.
Tips for Building Durable Frames
- Use a quality wood glue: A good wood glue will help to create a strong bond between the pieces of wood in your frame.
- Pre-drill holes: Pre-drilling holes for your screws will prevent the wood from splitting and ensure a secure attachment.
- Use screws or nails that are long enough: Make sure your screws or nails are long enough to penetrate through both pieces of wood and into the framing underneath.
- Finish the frames: After assembling the frames, it’s important to finish them to protect them from the elements. Apply a sealant or paint to prevent moisture from penetrating the wood and causing damage.
Finishing the Cabinets

Now that your cabinet frames are built, it’s time to give them a durable and attractive finish that will stand up to the elements. The right finish will not only protect your cabinets from moisture, UV rays, and other outdoor hazards, but also enhance their appearance and complement the overall design of your outdoor kitchen.
Preparing the Cabinets for Finishing
Before you apply any finish, it’s essential to properly prepare the cabinet surfaces. This involves sanding, cleaning, and priming.
- Sanding: Sanding smooths out any rough edges, removes imperfections, and creates a uniform surface for the finish to adhere to. Start with a coarse grit sandpaper (80-120 grit) to remove any major imperfections, then progressively use finer grits (150-220 grit) for a smooth finish.
- Cleaning: After sanding, thoroughly clean the cabinets with a damp cloth and mild detergent to remove dust, debris, and sanding residue. Allow the cabinets to dry completely before proceeding.
- Priming: Applying a primer helps the paint or stain adhere better and provides a uniform base for the finish. Choose a primer specifically designed for outdoor use, as it will offer better protection against moisture and UV damage.
Applying the Finish
Once the primer is dry, you can apply your chosen finish. Outdoor kitchen cabinets are often finished with paint or stain.
- Paint: Paint is a good choice for outdoor cabinets as it provides a durable and easily repairable finish. Choose a high-quality exterior paint formulated for durability and weather resistance. Consider using a paint sprayer for a smooth and even finish, especially for large areas.
- Stain: Stain is a popular option for outdoor cabinets as it allows the natural grain of the wood to show through. Choose a stain specifically designed for outdoor use, as it will be more resistant to fading and weathering. Apply stain with a brush or cloth, following the manufacturer’s instructions.
Weather-Resistant Finishes
It’s crucial to use weather-resistant finishes for outdoor cabinets to protect them from the elements. Look for products that are specifically formulated for outdoor use and offer resistance to moisture, UV rays, mildew, and fading.
- Moisture Resistance: Moisture can cause wood to rot, warp, and crack. Choose finishes that are water-resistant and repel moisture.
- UV Resistance: UV rays from the sun can cause wood to fade and deteriorate. Select finishes that offer UV protection to prevent discoloration and premature aging.
- Mildew Resistance: Mildew can grow on wood surfaces in humid environments. Look for finishes that contain mildewcide to prevent mildew growth.
Tips for Achieving a Durable and Attractive Finish
- Apply multiple coats: Apply thin, even coats of paint or stain, allowing each coat to dry completely before applying the next. This will create a durable and long-lasting finish.
- Use a quality brush or sprayer: Use a brush or sprayer specifically designed for paint or stain. This will help ensure a smooth and even application.
- Clean up promptly: Clean up any spills or drips immediately to prevent them from staining the cabinets.
- Protect the finish: After the finish is dry, apply a sealant to protect it from moisture, UV rays, and other elements.
Incorporating Lighting and Electrical: Diy Outdoor Kitchen Cabinets

Creating a functional and aesthetically pleasing outdoor kitchen requires careful consideration of lighting and electrical needs. Well-planned lighting can enhance the ambiance, improve visibility, and highlight key features of your outdoor kitchen. This section will guide you through designing and installing lighting and electrical components safely and effectively.
Types of Outdoor Lighting
Outdoor lighting offers a wide range of options, each with its unique advantages and disadvantages. Selecting the right type of lighting depends on the specific needs of your outdoor kitchen, such as ambiance, functionality, and budget.
- LED Lights: LED lights are energy-efficient and long-lasting, making them a popular choice for outdoor kitchens. They come in various colors and styles, allowing you to create a specific mood or highlight certain features. They are also durable and resistant to weather conditions.
- String Lights: String lights are a versatile and decorative lighting option that can add a warm and inviting ambiance to your outdoor kitchen. They are available in various styles, including globe lights, fairy lights, and Edison bulbs, and can be strung across beams, railings, or even trees.
- Solar Lights: Solar lights are a sustainable and cost-effective option for outdoor lighting. They rely on solar panels to charge batteries during the day, providing light at night. They are a great choice for areas with limited access to electricity.
Installing Electrical Wiring and Outlets
Properly installing electrical wiring and outlets is crucial for safety and functionality. It is recommended to consult with a qualified electrician for complex installations.
- Safety Precautions: Always disconnect power before working on electrical wiring. Use appropriate tools and safety gear, such as insulated gloves and safety glasses.
- Wiring Considerations: Use outdoor-rated wiring and outlets specifically designed for outdoor use. Ensure that all wiring is properly grounded to prevent electrical shocks.
- Outlet Placement: Strategically place outlets near appliances and lighting fixtures. Consider the placement of appliances and their power requirements.
Designing a Lighting Plan, Diy outdoor kitchen cabinets
A well-designed lighting plan incorporates ambient, task, and accent lighting to create a balanced and functional outdoor kitchen.
- Ambient Lighting: Ambient lighting provides overall illumination, creating a comfortable and inviting atmosphere. Recessed lighting, string lights, or lanterns can be used for ambient lighting.
- Task Lighting: Task lighting provides focused illumination for specific areas, such as the cooking area or dining table. Under-cabinet lights or pendant lights can be used for task lighting.
- Accent Lighting: Accent lighting highlights specific features, such as plants, artwork, or architectural elements. Spotlights or wall sconces can be used for accent lighting.
With a little planning, careful execution, and a touch of creativity, you can transform your backyard into a culinary oasis with DIY outdoor kitchen cabinets. By following the steps Artikeld in this guide, you’ll be well on your way to creating a personalized outdoor cooking space that reflects your unique style and meets your specific needs. So, gather your tools, unleash your inner builder, and embark on a rewarding DIY project that will enhance your outdoor living experience.

