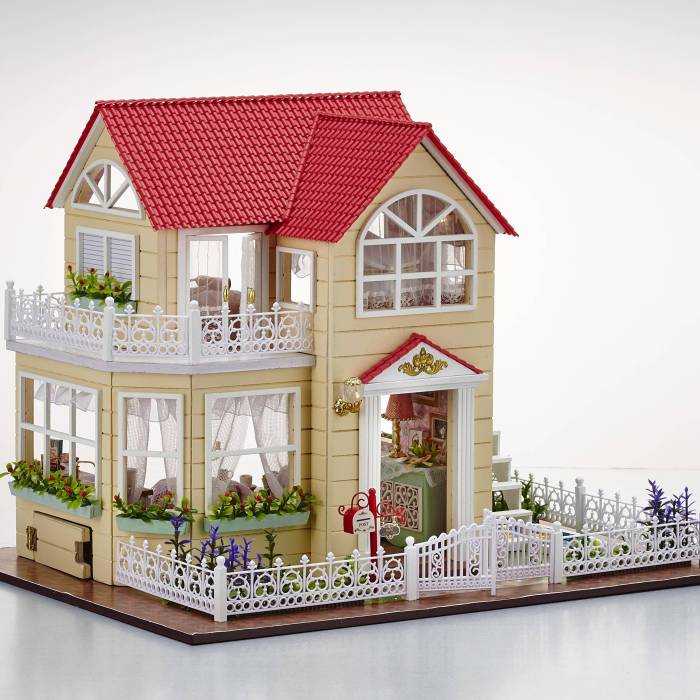
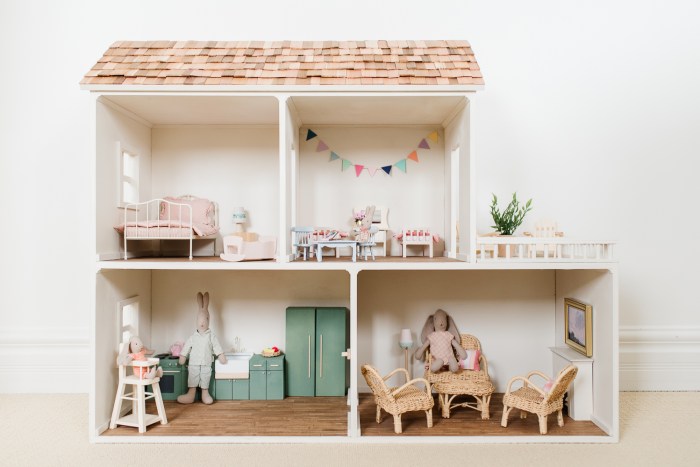
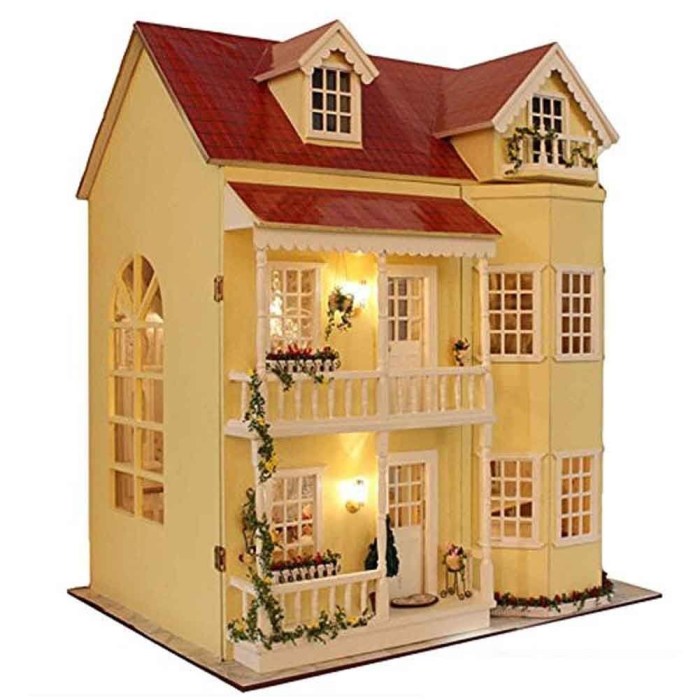
DIY wooden dollhouses offer a captivating blend of creativity, craftsmanship, and nostalgia. These miniature masterpieces allow you to unleash your imagination, transforming simple wood into charming and personalized homes for beloved dolls. The allure of building a dollhouse from wood lies in the tangible satisfaction of creating something unique, from choosing the perfect wood to meticulously crafting each detail.
The versatility of wood makes it an ideal material for dollhouse construction. Its durability ensures your creation will stand the test of time, while its workability allows for intricate designs and personalized touches. Whether you envision a simple cottage or an elaborate Victorian mansion, wood provides the foundation for bringing your dollhouse dreams to life.
The Allure of DIY Wooden Dollhouses

There’s a special kind of magic in creating a dollhouse from scratch. It’s not just about building a miniature home; it’s about crafting a world of imagination, a place where stories unfold and dreams take shape. Building a wooden dollhouse offers a unique blend of creativity, personalization, and lasting satisfaction.
The choice of wood as the primary material adds a special dimension to this hobby. Wood is a natural, durable, and versatile material that lends itself beautifully to the intricate details and craftsmanship involved in dollhouse construction. It offers a warm, inviting aesthetic that’s hard to replicate with other materials.
The Diverse World of Wooden Dollhouses
The beauty of DIY wooden dollhouses lies in their endless possibilities. From simple, charming designs to elaborate, multi-story creations, the spectrum of wooden dollhouses caters to a wide range of interests and skill levels.
- Simple Dollhouses: These are perfect for beginners and those seeking a quick and rewarding project. Often featuring basic shapes and minimal details, they allow for a focus on fundamental woodworking skills and creative decoration.
- Traditional Dollhouses: Inspired by classic architectural styles, these dollhouses often feature intricate details like gingerbread trim, decorative windows, and charming porches. They offer a sense of nostalgia and timeless beauty.
- Modern Dollhouses: Embracing contemporary design principles, these dollhouses showcase clean lines, geometric shapes, and minimalist details. They often feature innovative materials and techniques, reflecting the latest trends in architecture.
- Theme-Based Dollhouses: From Victorian mansions to cozy cottages, these dollhouses are inspired by specific themes or periods, allowing for a deeper immersion in the chosen aesthetic. They often incorporate historical details and unique architectural elements.
Design and Planning Your Dollhouse
Designing and planning your dollhouse is an exciting step in the DIY process. This stage allows you to bring your vision to life, deciding on the size, layout, and details that will make your dollhouse unique. From choosing the right scale to incorporating personalized elements, this phase involves a lot of creativity and planning.
Choosing a Scale
The scale of your dollhouse determines its size and the size of the furniture and accessories you’ll need. Common dollhouse scales include:
- 1:12 scale: This is the most popular scale, often referred to as “miniature” or “dollhouse scale.” It means that every inch in the real world is represented by one inch in the dollhouse. This scale offers a good balance between detail and manageability.
- 1:24 scale: This is a smaller scale, sometimes called “half-scale.” It offers more space for intricate details but requires smaller furniture and accessories. It’s a good option for those who prefer a more compact dollhouse.
- 1:48 scale: This is a very small scale, often used for dollhouse miniatures. It requires exceptional precision and detail work. This scale is best suited for experienced dollhouse builders.
Choosing the right scale depends on your space, the complexity you desire, and the availability of furniture and accessories in that scale.
Determining the Layout
The layout of your dollhouse is crucial for creating a functional and aesthetically pleasing space. It involves deciding on the number of rooms, their arrangement, and the flow of the dollhouse.
- Sketching Ideas: Start by sketching out your ideas on paper. Experiment with different room layouts, shapes, and sizes. This step helps visualize the flow of the dollhouse and identify potential challenges.
- Creating Floor Plans: Once you have a basic idea, create detailed floor plans using graph paper or specialized software. Floor plans help you visualize the layout and dimensions of each room, ensuring everything fits together seamlessly.
- Incorporating Personalized Details: Add personalized details to your dollhouse based on your interests, hobbies, or favorite architectural styles. These details could include a fireplace, a balcony, a porch swing, or even a unique roofline.
For example, if you’re a fan of Victorian architecture, you could incorporate intricate details like gingerbread trim, bay windows, and a steeply pitched roof.
Inspirational Dollhouse Designs
Here are some inspiring examples of dollhouse designs that showcase different architectural styles, room arrangements, and decorative elements:
- Victorian Dollhouse: Featuring intricate details, gingerbread trim, bay windows, and a steeply pitched roof, Victorian dollhouses exude elegance and charm.
- Modern Dollhouse: Emphasizing clean lines, minimalist design, and open floor plans, modern dollhouses reflect contemporary architecture.
- Cottage Dollhouse: Featuring a cozy and inviting atmosphere, cottage dollhouses often have a rustic charm with exposed beams, a stone fireplace, and a charming porch.
- Tudor Dollhouse: Characterized by steep gables, half-timbered walls, and a prominent chimney, Tudor dollhouses evoke a sense of history and tradition.
These are just a few examples, and the possibilities are endless! Explore different architectural styles and design elements to create a dollhouse that reflects your unique personality.
Planning Your Dollhouse Project
Planning is essential for a successful dollhouse project. It helps you estimate the materials, time, and budget needed to complete the project.
- Gathering Materials: Once you have a detailed floor plan, you can start gathering the materials needed for construction. This includes wood, glue, paint, tools, and any other specific materials required for your design.
- Estimating Time and Budget: Based on the complexity of your design and the materials you need, estimate the time and budget required for the project. Consider the time needed for each stage of the construction process, from cutting and assembling to painting and decorating.
For example, a simple dollhouse made from pre-cut wood might take a few days to build, while a more elaborate design with custom-made details could take weeks or even months.
Tips for Planning Your Dollhouse
Here are some practical tips for planning your dollhouse project:
- Start with a Simple Design: If you’re a beginner, start with a simple design to gain experience and build confidence. You can always add more complex details later.
- Choose a Scale That Suits Your Needs: Consider the size of your space and the complexity of the design when choosing a scale.
- Plan the Layout Carefully: Create detailed floor plans to ensure everything fits together seamlessly.
- Incorporate Personalized Details: Add elements that reflect your interests and personality to make your dollhouse unique.
- Estimate Materials and Time: Gather all the necessary materials and estimate the time and budget required for the project.
- Break Down the Project into Smaller Steps: Divide the project into manageable steps to avoid feeling overwhelmed.
Remember, planning is key to a successful dollhouse project. By taking the time to design and plan carefully, you’ll set yourself up for a rewarding and enjoyable building experience.
Adding Walls, Roof, and Flooring

Now that the dollhouse frame is ready, it’s time to add the walls, roof, and flooring. This is where the dollhouse starts to take shape and you can really see your vision come to life.
Adding Walls
Adding the walls is a crucial step, as they form the structure of the dollhouse and provide a surface for decorating. You’ll need to carefully cut and attach wall panels to the frame, ensuring they fit snugly and create a smooth finish.
- Cut the wall panels to size. Use a saw, such as a jigsaw or table saw, to cut the wall panels to the exact dimensions needed for your dollhouse. Make sure to measure twice and cut once to avoid any errors.
- Attach the wall panels to the frame. You can use wood glue, nails, or screws to attach the wall panels to the frame. Be sure to apply glue evenly and use enough fasteners to ensure the panels are securely attached. You can also use clamps to hold the panels in place while the glue dries.
- Sand the walls smooth. Once the glue has dried, sand the walls smooth to remove any rough edges or imperfections. This will create a smooth surface for painting or wallpapering.
Constructing the Roof
The roof is a key element of the dollhouse, adding to its visual appeal and providing protection for the interior. You’ll need to build a sturdy roof frame and attach it to the walls, ensuring it’s properly supported and secured.
- Create the roof frame. Use wood strips or beams to create a frame for the roof. You can use a variety of techniques to construct the frame, depending on the style of roof you want. For example, you could use a simple gable roof or a more elaborate hip roof.
- Attach the roof frame to the walls. Once the roof frame is complete, attach it to the walls using glue, nails, or screws. Make sure the frame is securely attached and properly supported.
- Add roofing material. Once the frame is in place, you can add roofing material, such as shingles, tiles, or even felt paper. There are many different types of roofing materials available, so choose one that complements the style of your dollhouse.
Installing Flooring, Diy wooden dollhouse
The flooring is the foundation of the dollhouse’s interior, adding to its aesthetic appeal and creating a finished look. You’ll need to choose flooring materials that are suitable for the dollhouse’s scale and style, and install them carefully to ensure a smooth and durable finish.
- Choose flooring materials. There are many different flooring options available for dollhouses, including wood, tile, and even carpet. Consider the style of your dollhouse and the level of detail you want to achieve when selecting flooring materials.
- Cut the flooring to size. Once you’ve chosen your flooring materials, cut them to the exact dimensions needed for each room of the dollhouse. Be sure to measure twice and cut once to avoid any errors.
- Install the flooring. You can use glue, nails, or screws to install the flooring. Be sure to apply glue evenly and use enough fasteners to ensure the flooring is securely attached. You can also use a hammer and nails to secure the flooring, but be careful not to damage the surrounding walls or roof.
Adding Decorative Details
Once the walls, roof, and flooring are in place, you can start adding decorative details to enhance the dollhouse’s visual appeal. This could include adding windows, doors, molding, and other architectural features.
- Add windows and doors. You can purchase pre-made windows and doors or create your own using wood, plastic, or other materials. Be sure to choose windows and doors that are the right size and style for your dollhouse.
- Add molding. Molding can add a touch of elegance and sophistication to your dollhouse. You can use wood molding or create your own using paper or cardboard. Molding can be used to create trim around the windows and doors, as well as along the edges of the walls and roof.
- Add other decorative details. You can also add other decorative details to your dollhouse, such as balconies, porches, chimneys, and even a garden. Be creative and let your imagination run wild!
Finishing Touches and Personalization

After building the structure of your dollhouse, it’s time to add the finishing touches that will transform it from a simple wooden frame into a charming and personalized miniature world. This stage involves sanding, painting, and adding unique details to create a polished and inviting space for your miniature inhabitants.
Sanding and Painting
Sanding the dollhouse is essential for a smooth and even surface for painting. Start by using coarse-grit sandpaper to remove any rough edges or imperfections, then gradually transition to finer-grit sandpaper to achieve a smooth finish. This process prepares the wood for paint and allows for a more professional look.
Once the sanding is complete, you can begin painting the dollhouse. Choose paints that are specifically designed for wood, as these offer better adhesion and durability. Consider using primer before applying the main color to ensure a smooth and even finish. For a more natural look, you can use wood stains or wood finishes.
When selecting paint colors, consider the overall aesthetic you want to achieve. For a classic and timeless look, opt for neutral colors like white, cream, or beige. For a more whimsical and playful design, consider using bright and vibrant colors.
Adding Personal Touches
Personalization is what truly sets your dollhouse apart. There are endless possibilities for adding unique details and creating a truly special space.
- Custom Features: Add custom features like fireplaces, balconies, or window boxes to enhance the dollhouse’s charm and functionality. You can create these features from wood, cardboard, or even polymer clay.
- Incorporating Personal Touches: Add personal touches that reflect your own style and interests. For example, you could include miniature versions of your favorite books, artwork, or furniture.
- Creating Unique Stories: Develop a backstory for your dollhouse and its inhabitants. This can involve creating family histories, professions, and hobbies for the miniature residents. You can even add small details that hint at their personalities and relationships.
“The beauty of a DIY dollhouse lies in its ability to become a reflection of your creativity and personality.”
Inspiring Dollhouse Ideas and Projects
You’ve mastered the fundamentals of building a DIY wooden dollhouse, and now it’s time to unleash your creativity! This section showcases a collection of inspiring dollhouse projects, highlighting different design styles, construction techniques, and decorative elements. Each example serves as a springboard for your own unique dollhouse vision.
Examples of DIY Dollhouse Projects
The world of dollhouse design is vast and diverse. From miniature Victorian mansions to whimsical treehouse retreats, these examples demonstrate the incredible range of possibilities.
| Project Name | Description | Featured Techniques | Image |
|---|---|---|---|
| Victorian Dollhouse | A meticulously crafted dollhouse with intricate details, featuring a grand facade, multiple levels, and a balcony overlooking a miniature garden. | Precise woodworking, intricate trim work, and detailed miniature furniture. | A photo of a dollhouse with a white facade, ornate details, and a balcony with miniature plants. The dollhouse is positioned on a table with a miniature garden in the foreground. |
| Modern Farmhouse Dollhouse | A contemporary take on a classic farmhouse design, featuring clean lines, natural materials, and a minimalist aesthetic. | Simple construction techniques, using reclaimed wood and natural finishes. | A photo of a dollhouse with a simple rectangular design, painted in a muted gray color. The dollhouse has a pitched roof and large windows. |
| Treehouse Dollhouse | A whimsical and imaginative dollhouse designed to resemble a treehouse, featuring a whimsical design, a rope ladder, and a slide. | Creative construction techniques, using natural materials like branches and logs. | A photo of a dollhouse shaped like a treehouse, perched on a wooden base with a rope ladder leading to the entrance. The dollhouse has a wooden exterior and a thatched roof. |
| Tiny Cottage Dollhouse | A charming and compact dollhouse featuring a cozy interior, a small garden, and a miniature picket fence. | Simple construction techniques, using readily available materials and focusing on creating a cozy and inviting atmosphere. | A photo of a dollhouse with a thatched roof, a small garden with miniature flowers and a picket fence surrounding the property. |
Building a DIY wooden dollhouse is a rewarding journey that combines the joy of crafting with the magic of miniature worlds. From meticulously selecting the right wood to adding the finishing touches, each step allows you to express your creativity and create a unique and cherished heirloom. Whether you’re a seasoned woodworker or a curious beginner, the world of DIY dollhouses offers endless possibilities for imagination and craftsmanship.
Building a DIY wooden dollhouse is a fun and rewarding project. You can personalize it with intricate details and even incorporate moving parts, just like you would with a DIY robot arm. The possibilities are endless when you combine your creativity with the satisfaction of crafting something unique and special.
